

User Guide
Self-Service Billing Overview for Shippers

Pricing data is for illustration purposes only and does not reflect actual prices
The billing page has been updated with a reorganized layout to prioritize the most important information and provide an intuitive user-friendly experience. Two-factor verification provides an extra layer of security to the account and is required to make any changes to the page. Users with the role of Owner or Admin in Manage Users have permission to make changes after the two-factor authentication. The billing page is available from the account name dropdown, by selecting Billing.
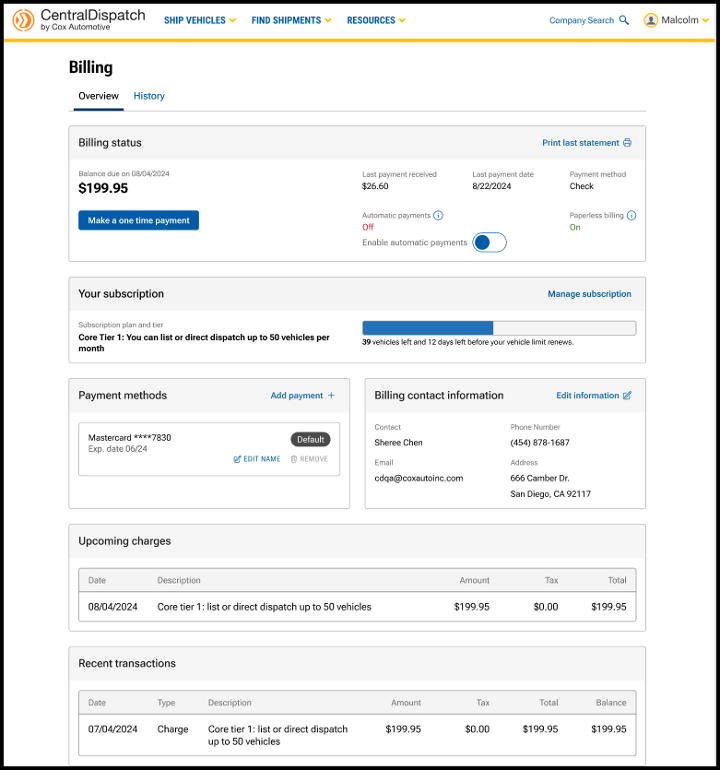
Billing Status

- Link available to Print last statement.
- Click on the History tab to view and print previous months’ statements.
- View Balance due and due date.
- Note: Please note amount displayed is not due until Balance due date.
- Make a payment by clicking on Make a one-time payment.
- Note: If moving to a new tier, make a one-time payment for the dollar amount difference between the tiers to get access to new tier.
- Choose to pay balance or another amount.
- Choose payment method.

- Users can also click toggle when making a payment to enroll in autopay.
- Previous payment information including payment amount, date and payment method.
- Toggle to Enable Automatic Payments on or off.

Result: a confirmation message will appear for users to confirm automatic payments.
Your Subscription
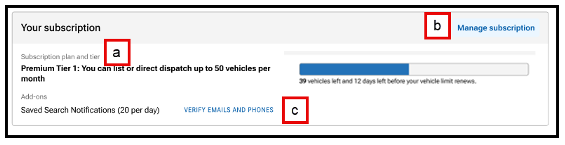
- View your subscription plan and any add-ons to your account such as notifications.
- Tier limits are based on vehicles that are posted or dispatched.
- Each vehicle that is listed or dispatched counts toward the monthly vehicle quota.
- When the tier limit is reached, it will trigger a notification to the user and additional vehicles will not be able to be dispatched or listed until next billing cycle or upgrade to the next tier.
- Click on Manage subscription to view the subscription plan options, tiers available, and any add-ons selected.
- Select Plan.
- If you are interested in an Enterprise Solution, please complete the form and a member of our Enterprise team will be reaching out within 1- 2 business days.
- Select Tier.
- Available tiers change depending on the plan selected.

- Available tiers change depending on the plan selected.
- Select Add-ons.

- Review any changes and click Update subscription.

- Note: Changing Notifications tiers:
- If Adding Notifications, the user will need to verify the contact email and phone number for the notifications.

- If Removing Notifications, the change will take place on the next billing cycle.

- If Adding Notifications, the user will need to verify the contact email and phone number for the notifications.
- Select Plan.
- If signed up for search Notifications, the MANAGE EMAIL AND PHONE link will be visible to update the email address and the phone number to receive the notifications.
- Result: Communications tab on the Company Profile page will open to update or add email and phone for notifications.

- Result: Communications tab on the Company Profile page will open to update or add email and phone for notifications.
Payment Methods and Billing Contact Information
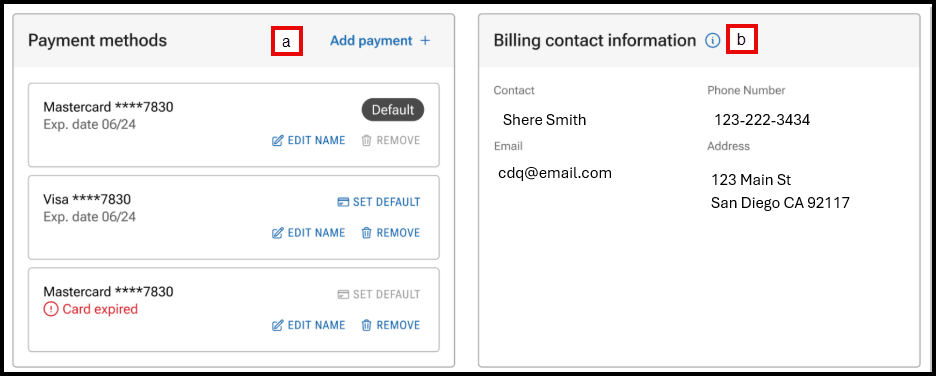
- Manage payment methods including setting a default card, adding, or removing a card.
- Click on Edit Information to update billing contact information.
- Result: the Company Profile page will open to the Contacts section and Billing Contact.

- Result: the Company Profile page will open to the Contacts section and Billing Contact.
Upcoming Charges and Recent Transactions
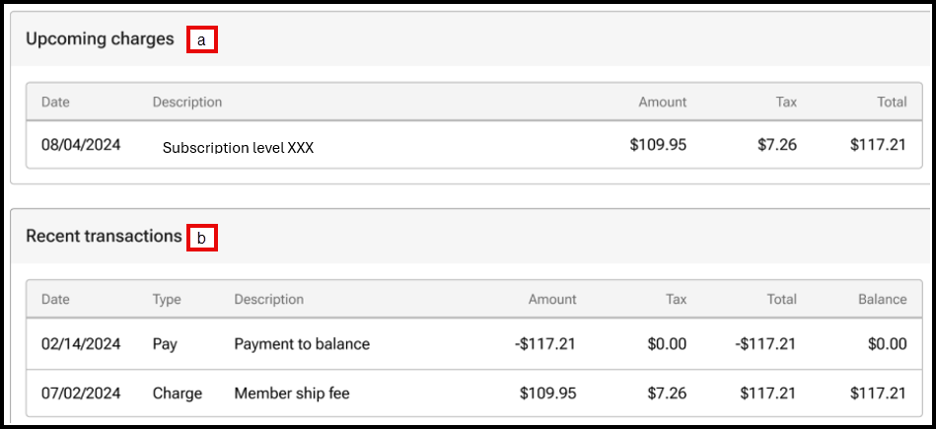
- View upcoming charges.
- View the most recent five transactions. Users can view additional transactions under under the History tab on the Billing page.
Billing History tab
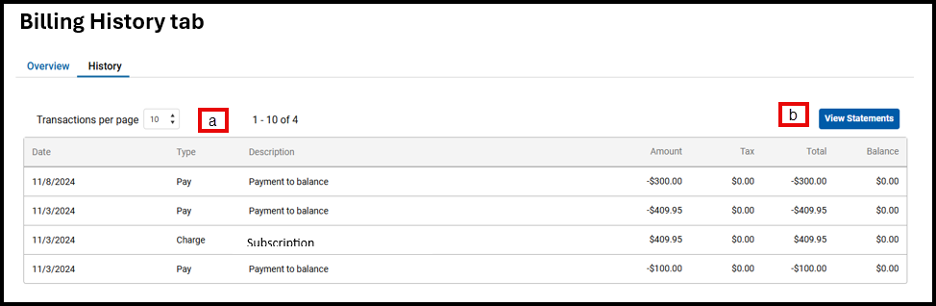
- Select the number of transactions per page to view the previous transactions.
- Click View Statement to view statements for previous months.
